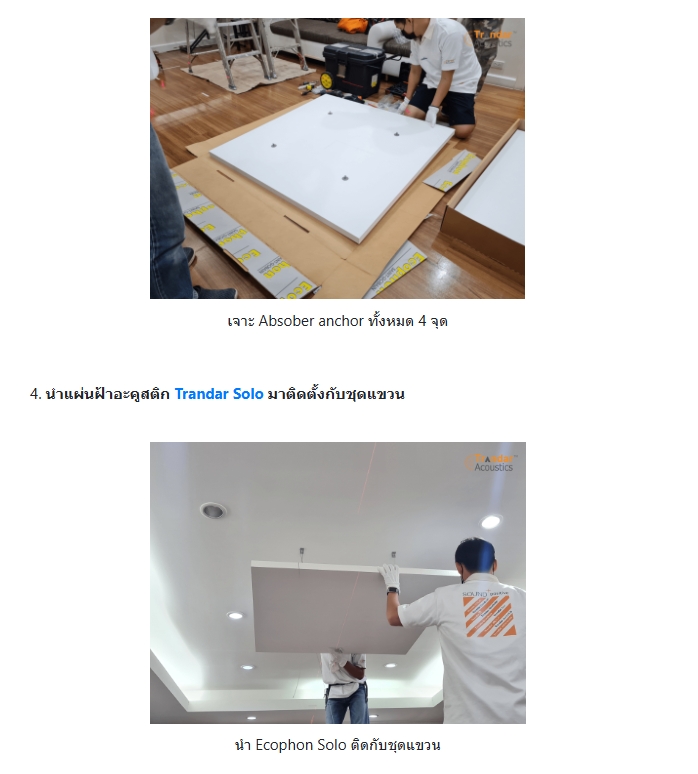
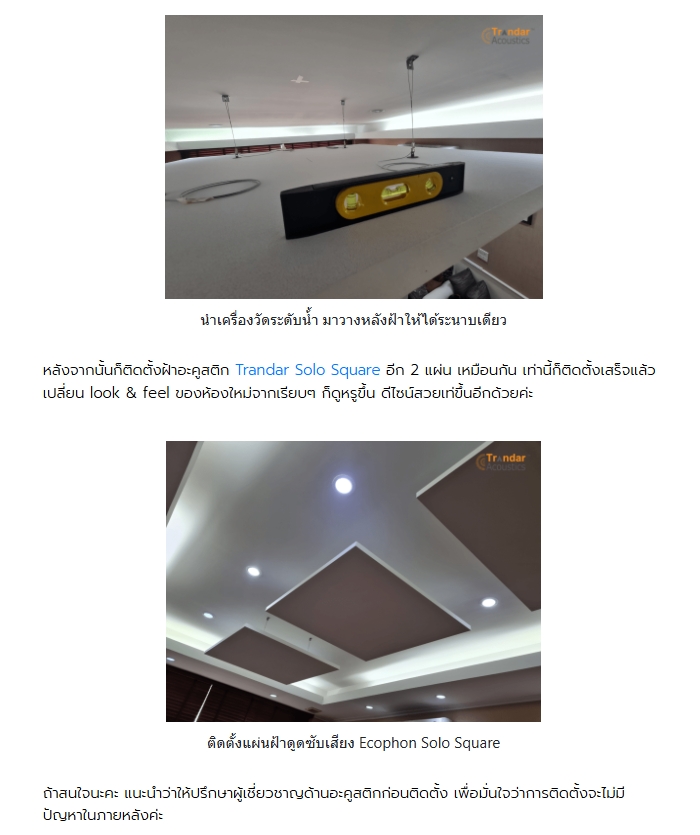
5 Tips: Easy DIY Installation Techniques for Beautiful Trandar Solo Ceiling
1. Use Laser Level and Measure Positions

Use laser to mark the position
First, mark the laser lines to be straight. Then, measure the distance and mark the ceiling panel positions
for each Trandar Solo Square panel at the desired points.
Start from the outermost panel, either from the far right or far left, depending on the technician's preference.
After that,measure the position of the panel on the other side to be aligned and equal.
2. Position and Install Adjustable Hanging Kit

Measure the installation points for the hanging kit, all 4 spots.
Use the square plate provided in the box to measure the installation points for the hanging kit, all 4 spots. Once you have
the correct and equal positions, use a drill to make holes in the gypsum ceiling. After drilling, insert the anchors and mounting brackets
onto the smooth plastered ceiling.

Use a drill to make holes in the gypsum ceiling

Install anchors and mounting brackets
Then, thread the sling cable through the bracket.
This sling can be cut to any desired length, to adjust the height of the panel.
Finally, thread the hook through the sling to achieve the desired hanging height for the Trandar Solo Square panel.

Thread the sling cable through the bracket
3. Drill Threads on the Back of Trandar Solo Acoustic Panels

Mark positions on the back of the Ecophon Solo ceiling
Use the corner measuring paper again to mark the positions on the back of the Trandar Solo panel.
Once you have thedesired points, use a screw to drill down. This equipment is called "Absorber anchor".

Drill all 4 Absorber anchors
You need to drill all 4 screws in alignment and with the heads facing the same direction. This step is crucial,another very important step.
Because if you don't mark the points beforehand, when it's time to hang the panel,it can make the panelcrooked and unsightly.

Drill all 4 Absorber anchors
4. Install Trandar Solo Acoustic Panels with Hanging Kit

Attach Ecophon Solo to the hanging kit

Attach Ecophon Solo to the hanging kit
Lift the Trandar Solo acoustic panel vertically (it's recommended to wear clean gloves before handling the panel).
And slowly lift the panel to attach it securely to all 4 points of the adjustable hanging kit.
Before locking it securely, you need to measure the hanging height of the panel to be 25.5 cm.

Measure the hanging height of the ceiling panel Lock the panel securely to the hanging kit
5. Attach Trandar Solo Acoustic Panels to the Hanging Kit
Once all 4 points are attached, use a spirit level on the back of the panel to ensure it is level.

Use a spirit level to ensure the panel is level.
After that, install 2 more Trandar Solo Square acoustic panels in the same way. This completes the installation.
It changes the look & feel of the room from plain to more luxurious and stylish.

Install Ecophon Solo Square sound-absorbing ceiling panels.
If interested, it is recommended to consult an acoustic expert before installation
to ensure that the installation will not have anyproblems later.
Inquire/order Trandar Acoustics products at
🛒 Website : www.trandar.com/store/
📱 Line OA : @Trandaraocoustic https://lin.ee/yoSCNwF
📱 Line OA : @Trandarstore https://lin.ee/xJr661u
☎️ Tel : 02-722-7007
Your email will not be displayed. Required fields are marked with *